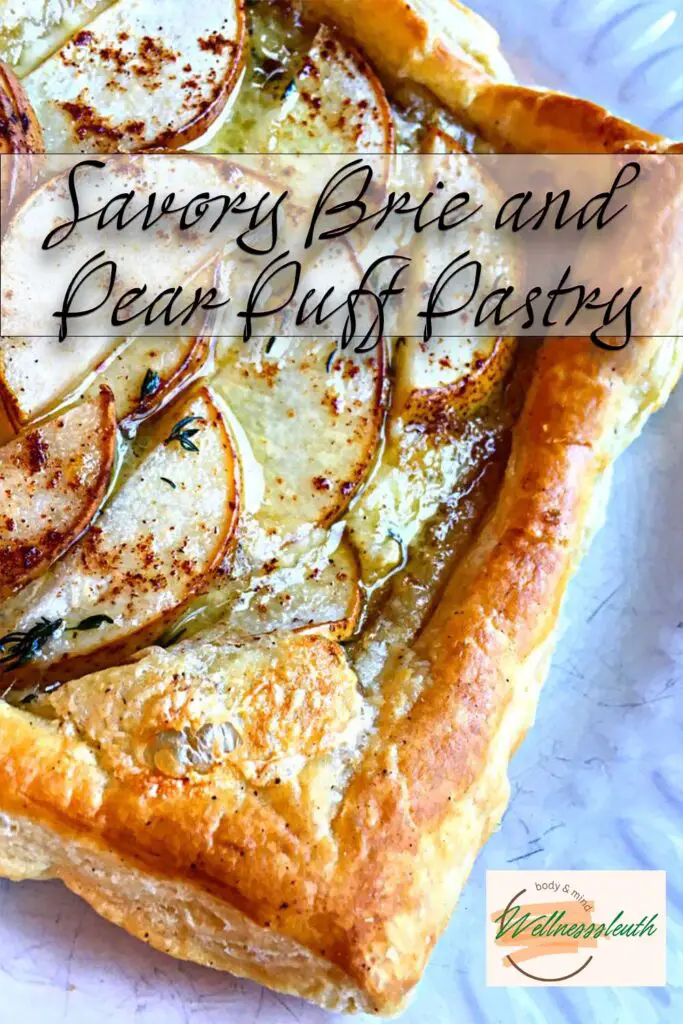
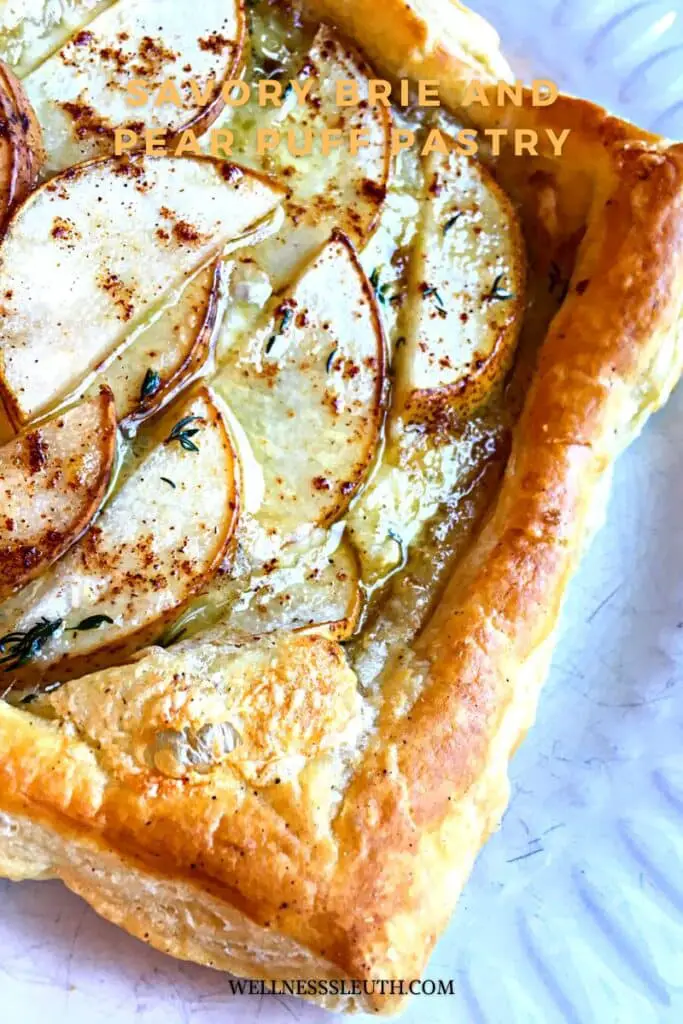
Brie and Pear Puff Pastry is a type of pastry that is made with Brie cheese and pears. The Brie cheese gives the pastry a creamy flavor, while the pears add a touch of sweetness. This pastry is often served as an appetizer or dessert, and it can be made ahead of time and frozen for later use.
Perfect for any party
Brie and Pear Puff Pastry is a quick and easy appetizer that is perfect for any party or gathering. Brie is a type of cheese that is soft and creamy, and it pairs perfectly with sweet and juicy pears. The puff pastry is light and flaky, and it only takes a few minutes to bake. This dish can be served warm or cold, and it is always a hit with guests.
About Brie and Pear Puff Pastry
Brie and Pear Puff Pastry is a delicious and easy to make pastry. It can be made with either Brie cheese or Gruyere cheese. The Brie cheese gives the pastry a rich and creamy flavor, while the Gruyere cheese gives it a more robust flavor. The Pear Puff Pastry can be made with either fresh or canned pears. I prefer to use fresh pears because they have a more delicate flavor. If you use canned pears, make sure to drain them well before using them in the pastry. Brie and Pear Puff Pastry can be served as an appetizer or a main course. It is best served with a light salad and some crusty bread.
- Prep Time: 10 minutes
- Cook Time: 25-30 minutes
- Servings Yield: 6 servings
Ingredients
Ingredients:
½ package frozen puff pastry
1 medium pear, ripe but firm, cut into thin slices
2 oz. Brie cheese, cut into thin slices with rind removed
2 sprigs of fresh thyme, stems removed
2 teaspoon ground cinnamon
1 teaspoon nutmeg
2 tablespoon maple syrup
1 large egg yolk
1 tablespoon water
Directions
Here's a step-by-step guide to making Brie with the provided ingredients:
- Preheat your oven to 375°F (190°C).
- Thaw the frozen puff pastry according to the package instructions.
- Roll out the puff pastry on a lightly floured surface into a rectangle about ⅛ inch thick.
- Cut the pastry into squares or rectangles, depending on your preference and the size of your Brie slices.
- Place a slice of Brie cheese on each piece of pastry.
- Arrange a few slices of ripe pear on top of the Brie.
- Sprinkle some ground cinnamon and nutmeg over the pear slices.
- Drizzle a little maple syrup over each piece.
- Sprinkle fresh thyme leaves over the top for added flavor.
- In a small bowl, whisk together the egg yolk and water to make an egg wash.
- Brush the edges of the pastry with the egg wash to help them seal.
- Fold the pastry over the filling, pressing the edges to seal them.
- Transfer the prepared pastries to a baking sheet lined with parchment paper.
- Brush the tops of the pastries with the remaining egg wash.
- Bake in the preheated oven for 25-30 minutes, or until the pastry is golden brown and the cheese is melted and bubbly.
- Remove from the oven and let cool for a few minutes before serving.
- Enjoy your delicious Brie pastries as a tasty appetizer or snack!

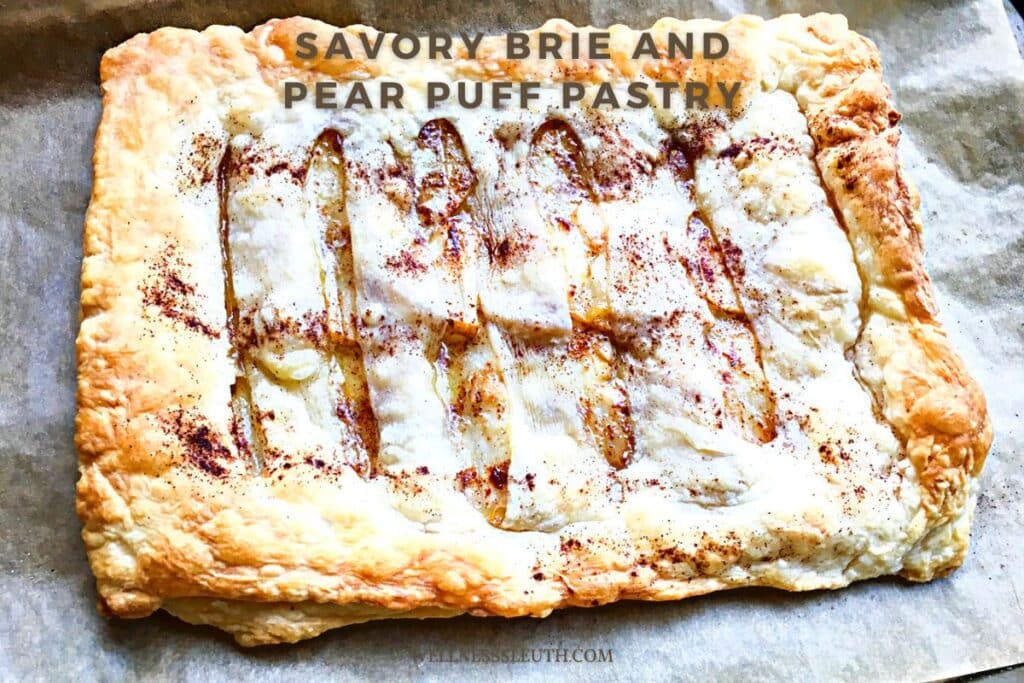
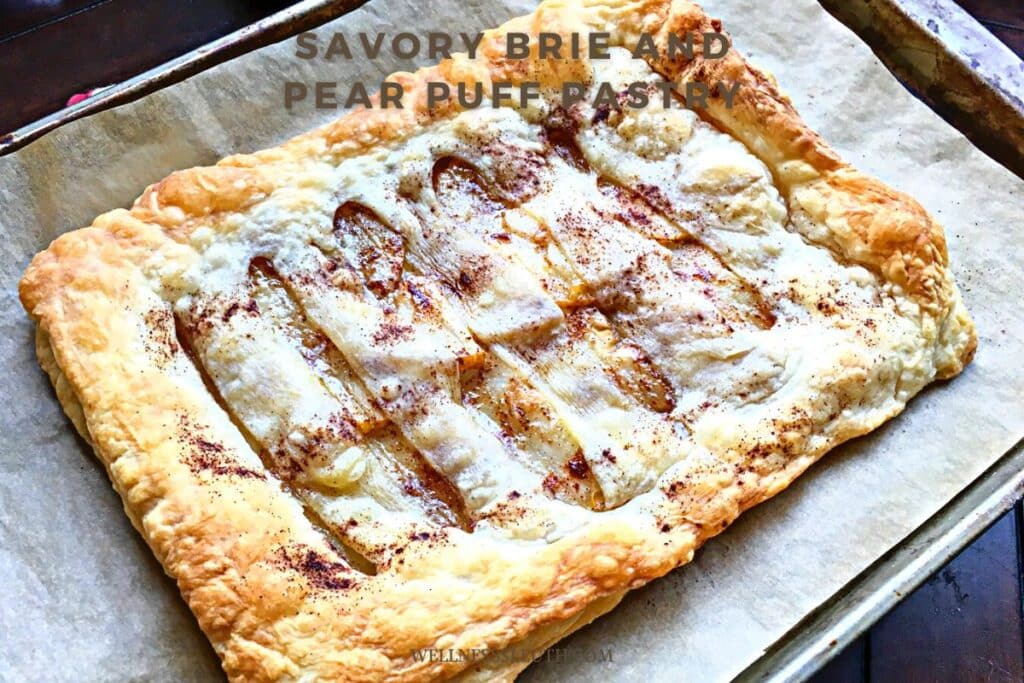
TIP: To create a picture frame effect as shown, cut around the perimeter of your sheet with a sharp knife about ½” from its outside edge but do not venture too far into the center.
- While you're waiting for your pie dough to proof, take stock of what ingredients you have and figure out how best to use them. Once it's ready (which should be in about an hour), carefully dock the pastry inside this cut with a fork just like when making crusts or pies--you'll want some space between each layer so they can rise evenly without getting stuck on top one another; if there isn't enough room at first then gently curve down from top edge before continuing onto next step:
- To create an egg wash, simply whisk one tablespoon of water with a raw egg yolk. Then brush this mixture over the outside exposed portion in order for it to help seal all edges when baking later on!
- The pastry “picture frame” puffs up and turns golden brown after baking for approximately 15-18 minutes. Remove from oven, and cool slightly before slicing to serve!

Savory Brie and Pear Puff Pastry
- Total Time: 0 hours
- Yield: 6 servings 1x
Ingredients
½ package frozen puff pastry
1 medium pear, ripe but firm, cut into thin slices
2 oz. Brie cheese, cut into thin slices with rind removed
2 sprigs of fresh thyme, stems removed
2 teaspoon ground cinnamon
1 teaspoon nutmeg
2 tablespoon maple syrup
1 large egg yolk
1 tablespoon water
Instructions
Here's a step-by-step guide to making Brie with the provided ingredients:
-
- Preheat your oven to 375°F (190°C).
-
- Thaw the frozen puff pastry according to the package instructions.
-
- Roll out the puff pastry on a lightly floured surface into a rectangle about ⅛ inch thick.
-
- Cut the pastry into squares or rectangles, depending on your preference and the size of your Brie slices.
-
- Place a slice of Brie cheese on each piece of pastry.
-
- Arrange a few slices of ripe pear on top of the Brie.
-
- Sprinkle some ground cinnamon and nutmeg over the pear slices.
-
- Drizzle a little maple syrup over each piece.
-
- Sprinkle fresh thyme leaves over the top for added flavor.
-
- In a small bowl, whisk together the egg yolk and water to make an egg wash.
-
- Brush the edges of the pastry with the egg wash to help them seal.
-
- Fold the pastry over the filling, pressing the edges to seal them.
-
- Transfer the prepared pastries to a baking sheet lined with parchment paper.
-
- Brush the tops of the pastries with the remaining egg wash.
-
- Bake in the preheated oven for 25-30 minutes, or until the pastry is golden brown and the cheese is melted and bubbly.
-
- Remove from the oven and let cool for a few minutes before serving.
-
- Enjoy your delicious Brie pastries as a tasty appetizer or snack!
- Prep Time: 10 minutes
- Cook Time: 25 - 30 minutes