Ricotta and Chocolate Cannoli Pie: a crispy crust, creamy ricotta, and chocolate chips in every bite! An easy, no-fry Italian dessert—get the recipe now!
Cannoli are a work of art,
Let’s be honest—cannoli are a gift from the Italian dessert gods. That crisp, golden shell. That luscious, sweet ricotta filling. That irresistible dusting of powdered sugar that inevitably ends up all over your shirt. But while cannoli are a work of art, they also require a bit of patience (and sometimes even deep frying).

A no-fuss, easy-to-slice pie.
Enter No-Bake Ricotta and Chocolate Cannoli Pie, where we take all the magic of classic cannoli and transform it into a no-fuss, easy-to-slice pie. Think of it as the best parts of cannoli, but in a rich, chocolate-studded, flaky-crusted dream.

Ready to make a dessert that will have everyone swooning? Let’s dive in.
Why You’ll Love This Ricotta and Chocolate Cannoli Pie
- All the cannoli flavor, none of the hassle – No piping or frying required!
- Creamy, dreamy filling – The ricotta stays light and fluffy, perfectly balanced with a touch of vanilla and citrus.
- A crispy, flaky crust – We use a simple pastry crust that mimics the crunch of a cannoli shell.
- Studded with chocolate chips – Because what’s a cannoli without a little chocolate?

Ingredients You’ll Need (a.k.a. the Dream Team of Italian Dessert Recipes)
For the No-Bake Crust:
- 1 ½ cups graham cracker crumbs (or crushed cannoli shells for bonus points)
- 6 tablespoon unsalted butter, melted
- 2 tablespoon sugar
- A pinch of cinnamon (because why not)
For the Cannoli Filling:
- 1 ½ cups whole milk ricotta (drain if watery)
- 1 cup mascarpone cheese (hello, richness!)
- ¾ cup powdered sugar
- 1 teaspoon vanilla extract
- Zest of 1 orange or lemon (totally optional but HIGHLY recommended)
- ½ cup mini chocolate chips (plus extra for sprinkling)
For Garnish:
- Powdered sugar, for dusting
- Additional mini chocolate chips
- Chopped pistachios (optional)
Recipe Details
- Prep Time: 20 minutes
- Chill Time: 4 hours
- Servings: 8 slices

Step-by-Step: How to Make No-Bake Cannoli Pie (Now with Extra Sass and Sensory Detail)
🥣 Step 1: Make the Crust (a.k.a. the buttery foundation of joy)
What You’ll Need:
- Medium mixing bowl
- Fork or silicone spatula
- 9-inch pie dish
- Measuring cups
- Flat-bottomed glass (yes, like a whiskey glass)
What You Do:
- Toss your graham cracker crumbs, sugar, and cinnamon into a bowl. Mix it like you're prepping sand for a beachside sandcastle.
- Slowly drizzle in that melted butter while stirring with a fork or spatula. You're aiming for that wet sand texture—damp enough to hold its shape when you press it between your fingers, but not greasy.
- Dump it all into your pie dish. Press it firmly into the bottom and slightly up the sides. Use the bottom of a flat glass to help get a smooth, compact crust—press gently but with purpose, like you mean it.
🔥 Pro Tip: If your crust crumbles when pressed, add a tablespoon more melted butter. Too wet? Add a tablespoon of extra crumbs.
Chill that baby. Stick it in the fridge for at least 30 minutes while you make the filling.
🧁 Step 2: Prep the Filling (this is where the magic happens)
What You’ll Need:
- Large mixing bowl
- Electric hand mixer or stand mixer
- Fine mesh sieve or cheesecloth (for draining ricotta)
- Rubber spatula
Drain First, Ask Questions Later:
Before anything else, check your ricotta. If it’s sitting in a puddle of liquid like it just got back from a sauna, it needs draining. Place it in a fine mesh sieve over a bowl (or wrap in cheesecloth) and let it sit for 30–60 minutes. You want it creamy, not watery.
💡 What to look for: Ricotta should be thick and spoonable—think Greek yogurt, not milkshake.
Now Mix:
- In your mixing bowl, add drained ricotta, mascarpone cheese, powdered sugar, and vanilla extract.
- Beat on medium speed for 2–3 minutes. You’re looking for a smooth, fluffy filling—no lumps, no gritty bits. It should hold soft peaks and glide off the beaters like a dream.
Fold in the Flavors:
- Add your citrus zest (optional but HIGHLY encouraged) and mini chocolate chips. Use a spatula to gently fold them in—like tucking a baby into bed, not folding a fitted sheet in a rage spiral.
❌ Mistake to Avoid: Don’t overbeat after adding chocolate chips—they’ll break up and smear. You want mini chips, not chocolate dust.
🥧 Step 3: Assemble the Pie (a.k.a. the glory moment)
- Grab your chilled crust from the fridge. It should feel firm and slightly cold to the touch.
- Spoon the filling into the crust and gently spread it to the edges using a spatula or the back of a spoon. Smooth out the top like frosting a cake—bonus points if you create some swirls for visual drama.
❄️ Step 4: Chill and Set (aka your time to shine while the fridge does the work)
- Cover the pie loosely with plastic wrap or foil.
- Place in the fridge for at least 4 hours, but ideally overnight for the best set and flavor meld.
🕒 Why it matters: This chill time lets the filling firm up so it slices cleanly, and gives all the flavors time to hang out and become best friends.
✨ Step 5: Decorate and Serve (the grand finale)
Just before serving, it’s your moment to get fancy.
Topping Ideas:
- Sprinkle with extra mini chocolate chips
- Crush pistachios over the top for crunch
- Add orange or lemon zest ribbons
- Pipe whipped cream rosettes around the edge (channel that inner Food Network contestant)
🎉 Pro Tip: Want to be really extra? Dust the top with powdered sugar through a fine sieve for that bakery-style finish.
Serving Tip:
Use a warm knife (dip in hot water, wipe dry) for clean slices. Serve cold and listen for the oohs and ahhs.
Utensils You’ll Need
- Food processor (or pastry cutter)
- Mixing bowls
- Whisk
- Fine-mesh strainer (for draining ricotta)
- Rolling pin
- 9-inch pie pan
- Plastic wrap (for chilling dough)
- Measuring cups and spoons
- Rubber spatula
- Pastry brush
Variations and Substitutions
- Crust Swap: Want a shortcut? Use a pre-made pie crust or even a graham cracker crust for a different twist.
- Flavor Boost: Swap orange zest for lemon zest, or add a splash of almond extract for extra depth.
- Chocolate Overload: Drizzle with melted chocolate for an even more indulgent finish.
- Nutty Crunch: Fold in some chopped pistachios or hazelnuts into the filling for a bit of texture.
Ingredient Swaps & Seasonal Twists
Let’s get creative, shall we?
- Gluten-Free: Use gluten-free graham crackers or almond flour crust.
- Vegan: Sub in vegan ricotta (made from almonds or tofu) and plant-based mascarpone or cream cheese.
- Festive Flair: Add cinnamon and nutmeg in fall, crushed peppermint in winter, or fresh berries in summer.
- Pistachio Power: Swap mini chocolate chips for chopped pistachios and drizzle with honey for a Sicilian twist.

Serving Suggestions
This pie is fantastic on its own, but here are a few ways to take it over the top:
- With a shot of espresso – The bitterness balances the creamy sweetness.
- Topped with whipped cream – Because more creaminess is always a good idea.
- Alongside fresh berries – The tartness of raspberries or strawberries cuts through the richness beautifully.

FAQs
Q: Can I make this pie ahead of time? A: Absolutely! It actually tastes better the next day once the flavors have had time to meld.
Q: How should I store leftovers? A: Keep it covered in the fridge for up to 3 days.
Q: Can I freeze this pie? A: Yes! Wrap it tightly and freeze for up to 2 months. Thaw in the fridge before serving.
Final Thoughts: Your New Favorite Italian Dessert
This Ricotta and Chocolate Cannoli Pie is everything you love about cannoli, with none of the deep-frying drama. It’s easy, it’s impressive, and it tastes like a little slice of Italy. So go ahead—dust off that pie pan and give it a try. And if you do? Leave a comment below and let me know how it turned out!
Buon appetito! 🇮🇹✨

Other Desserts especially for you
Cannoli Chips > easy to make and perfect for sharing with friends and family.
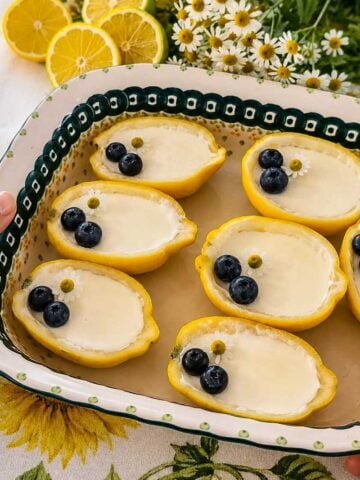
Blueberry Ricotta Cheesecake > a delightful dessert that will leave your taste buds dancing with joy.
Cranberry Orange Muffins > perfect for breakfast, snacks, or gatherings.
Strawberry Tiramisu > the ultimate fusion of creamy indulgence and sun-ripened freshness.

A Love Letter to Cannoli in Pie Form
- Total Time: 0 hours
- Yield: 8 servings 1x
Ingredients
Ingredients You’ll Need (a.k.a. the Dream Team of Italian Dessert Recipes)
For the No-Bake Crust:
1 ½ cups graham cracker crumbs (or crushed cannoli shells for bonus points)
6 tbsp unsalted butter, melted
2 tbsp sugar
A pinch of cinnamon (because why not)
For the Cannoli Filling:
1 ½ cups whole milk ricotta (drain if watery)
1 cup mascarpone cheese (hello, richness!)
¾ cup powdered sugar
1 tsp vanilla extract
Zest of 1 orange or lemon (totally optional but HIGHLY recommended)
½ cup mini chocolate chips (plus extra for sprinkling)
Instructions
Step-by-Step: How to Make No-Bake Cannoli Pie (Now with Extra Sass and Sensory Detail)
🥣 Step 1: Make the Crust (a.k.a. the buttery foundation of joy)
What You’ll Need:
-
Medium mixing bowl
-
Fork or silicone spatula
-
9-inch pie dish
-
Measuring cups
-
Flat-bottomed glass (yes, like a whiskey glass)
What You Do:
-
Toss your graham cracker crumbs, sugar, and cinnamon into a bowl. Mix it like you're prepping sand for a beachside sandcastle.
-
Slowly drizzle in that melted butter while stirring with a fork or spatula. You're aiming for that wet sand texture—damp enough to hold its shape when you press it between your fingers, but not greasy.
-
Dump it all into your pie dish. Press it firmly into the bottom and slightly up the sides. Use the bottom of a flat glass to help get a smooth, compact crust—press gently but with purpose, like you mean it.
🔥 Pro Tip: If your crust crumbles when pressed, add a tablespoon more melted butter. Too wet? Add a tablespoon of extra crumbs.
Chill that baby. Stick it in the fridge for at least 30 minutes while you make the filling.
🧁 Step 2: Prep the Filling (this is where the magic happens)
What You’ll Need:
-
Large mixing bowl
-
Electric hand mixer or stand mixer
-
Fine mesh sieve or cheesecloth (for draining ricotta)
-
Rubber spatula
Drain First, Ask Questions Later:
Before anything else, check your ricotta. If it’s sitting in a puddle of liquid like it just got back from a sauna, it needs draining. Place it in a fine mesh sieve over a bowl (or wrap in cheesecloth) and let it sit for 30–60 minutes. You want it creamy, not watery.
💡 What to look for: Ricotta should be thick and spoonable—think Greek yogurt, not milkshake.
Now Mix:
-
In your mixing bowl, add drained ricotta, mascarpone cheese, powdered sugar, and vanilla extract.
-
Beat on medium speed for 2–3 minutes. You’re looking for a smooth, fluffy filling—no lumps, no gritty bits. It should hold soft peaks and glide off the beaters like a dream.
Fold in the Flavors:
-
Add your citrus zest (optional but HIGHLY encouraged) and mini chocolate chips. Use a spatula to gently fold them in—like tucking a baby into bed, not folding a fitted sheet in a rage spiral.
❌ Mistake to Avoid: Don’t overbeat after adding chocolate chips—they’ll break up and smear. You want mini chips, not chocolate dust.
🥧 Step 3: Assemble the Pie (a.k.a. the glory moment)
-
Grab your chilled crust from the fridge. It should feel firm and slightly cold to the touch.
-
Spoon the filling into the crust and gently spread it to the edges using a spatula or the back of a spoon. Smooth out the top like frosting a cake—bonus points if you create some swirls for visual drama.
❄️ Step 4: Chill and Set (aka your time to shine while the fridge does the work)
-
Cover the pie loosely with plastic wrap or foil.
-
Place in the fridge for at least 4 hours, but ideally overnight for the best set and flavor meld.
🕒 Why it matters: This chill time lets the filling firm up so it slices cleanly, and gives all the flavors time to hang out and become best friends.
✨ Step 5: Decorate and Serve (the grand finale)
Just before serving, it’s your moment to get fancy.
Topping Ideas:
-
Sprinkle with extra mini chocolate chips
-
Crush pistachios over the top for crunch
-
Add orange or lemon zest ribbons
-
Pipe whipped cream rosettes around the edge (channel that inner Food Network contestant)
🎉 Pro Tip: Want to be really extra? Dust the top with powdered sugar through a fine sieve for that bakery-style finish.
Serving Tip:
Use a warm knife (dip in hot water, wipe dry) for clean slices. Serve cold and listen for the oohs and ahhs.
- Prep Time: 20 minutes
- Cook Time: 4 hour chill time
Leave a Reply