

There is something about putting a platter of these Crispy Beef Tortilla Cones on the table that makes everyone reach for one before you've even finished setting out the dipping sauce.
The outside is golden and crisp, but bite through that tortilla shell and you get the good part: juicy seasoned beef, little pieces of red and green pepper, and melted mozzarella stretching across the top.

They're somewhere between a crispy taco, a stuffed tortilla and a handheld appetizer — and that's exactly why they're fun.
I especially like these when I want something casual enough for a family dinner but interesting enough to put out for game night or a party. You can pick one up with your hands, dunk it into a cool garlic or yogurt sauce, and go straight back for another.

And don't let the cone shape intimidate you. If you can roll a tortilla, you can make these. The toothpick does the hard work of holding the shape while the tortilla becomes crisp.
🍽️ Recipe at a Glance
| Detail | What to Expect |
|---|---|
| 🥄 Difficulty | Easy |
| 🔪 Prep Time | 20 minutes |
| 🔥 Cook Time | 20 minutes |
| ⏱️ Total Time | 40 minutes |
| 🍽️ Yield | 12 cones |
| 🌯 Texture | Crisp tortilla shell, juicy beef filling and melted cheese |
| 💡 Best Tip | Don't overfill the cones — leaving a little room helps the tortilla stay crisp |
| 🎉 Best For | Appetizers, game day, casual dinners and party food |
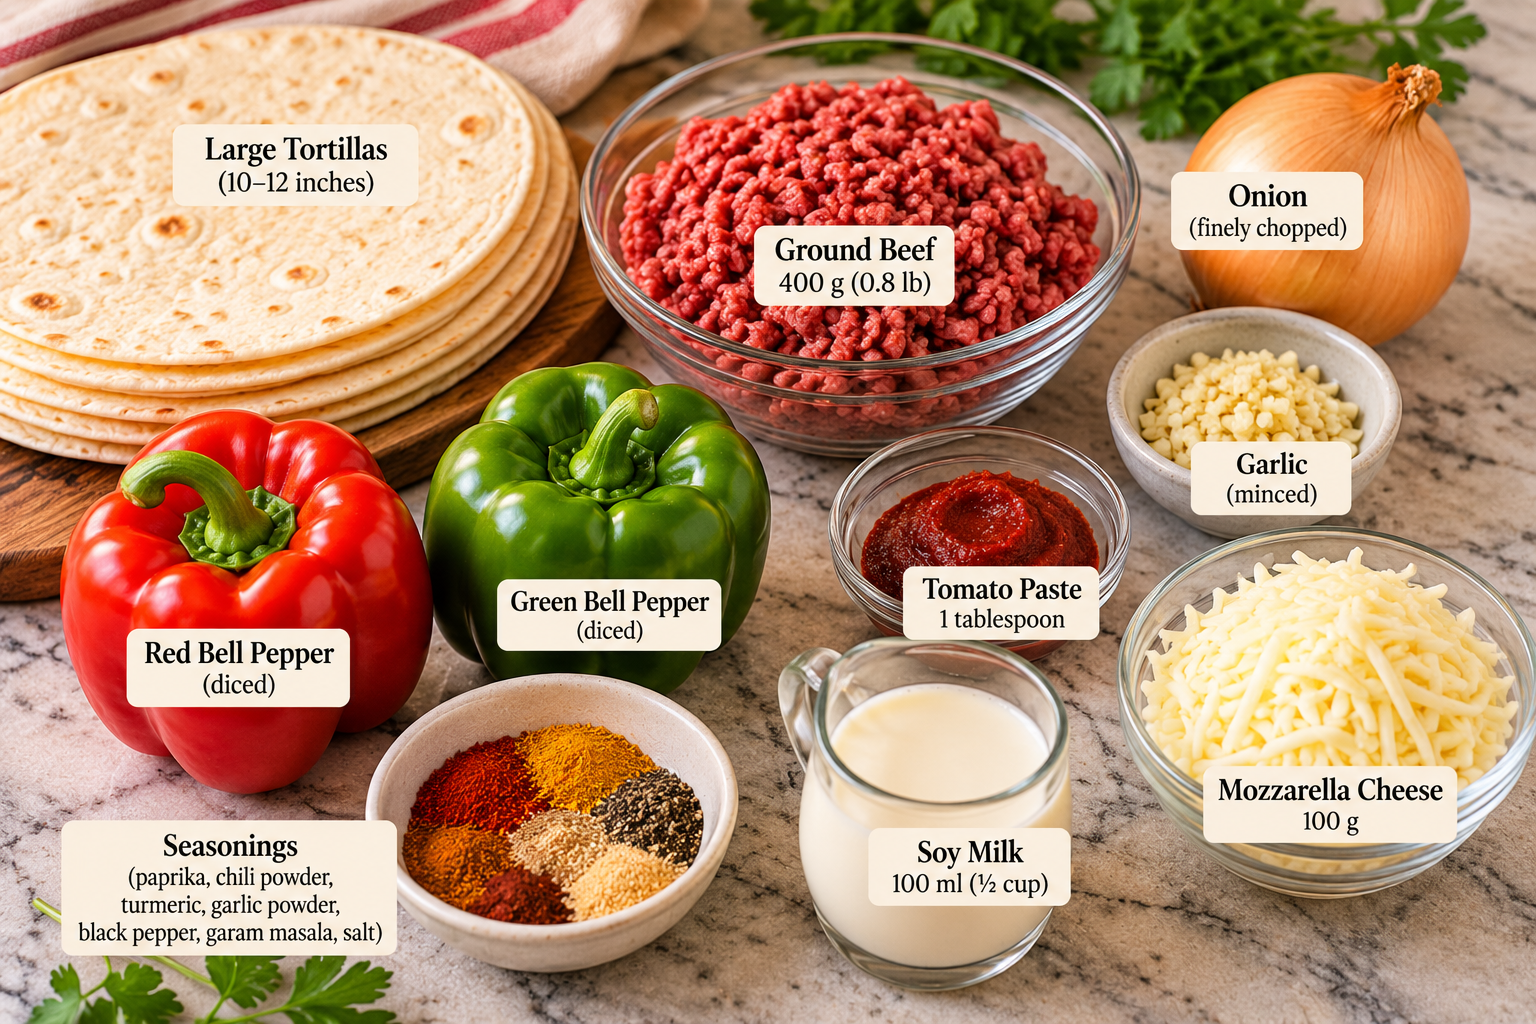
🛒 Ingredients You'll Need
For the Tortilla Cones
- 6 large tortillas, about 10–12 inches (25–30 cm)
- Toothpicks
For the Beef Filling
- 400 g (0.8 lb) ground beef
- 1 yellow onion, finely chopped
- 4 garlic cloves, minced
- 1 red bell pepper, diced (about 1 small pepper)
- 1 green bell pepper, diced (about 1 small pepper)
- 1 tablespoon tomato paste
- 100 ml soy milk (about ½ cup)
Cheese & Garnish
- 100 g mozzarella cheese
- 1 teaspoon chopped parsley
Seasonings
- 1 teaspoon paprika
- 1 teaspoon chili powder
- 1 teaspoon turmeric
- 1 teaspoon garlic powder
- 1 teaspoon black pepper
- 1 teaspoon garam masala
- ½ teaspoon salt
You'll also need a large skillet, baking tray, wooden spoon, cutting board and sharp knife. An air fryer can be used instead of the oven.
A note about the filling
The important thing here isn't just getting the beef cooked — it's getting the filling thick enough to stay inside the tortilla.
That's why we're letting the beef mixture cook down before filling the cones. If the mixture is watery, that moisture eventually moves into the tortilla, and a crisp cone becomes a soft one.
👩🍳 How to Make Crispy Beef Tortilla Cones
Step 1 — Start the Beef Filling
Heat a small amount of oil in a large skillet over medium heat.
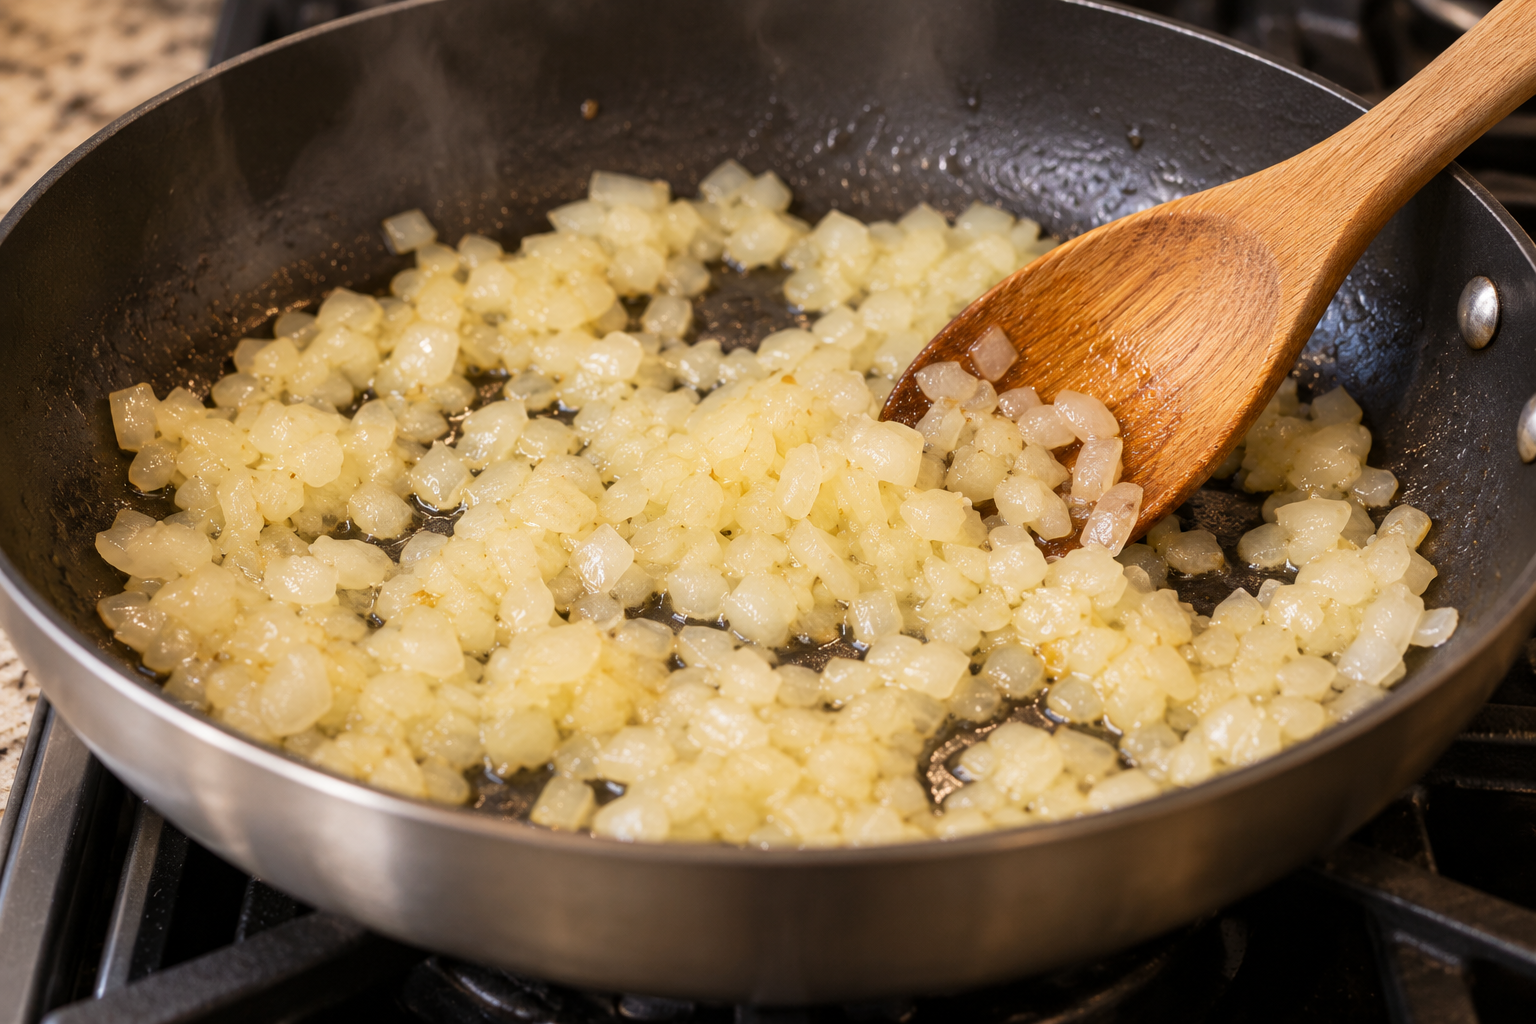
Add the finely chopped onion and sauté for 3–4 minutes, until softened.
💡 Helpful tip: Don't rush the onion. Giving it those few minutes first creates a sweeter, more savory base for the beef rather than leaving pieces of sharp-tasting onion in the filling.
Step 2 — Add the Garlic
Stir in the minced garlic and cook for about 30 seconds, just until fragrant.
You don't need longer than that. Garlic can become bitter when it browns too aggressively.
Step 3 — Brown and Season the Beef
Add the ground beef and cook for 8–10 minutes, breaking it apart with a wooden spoon as it cooks.
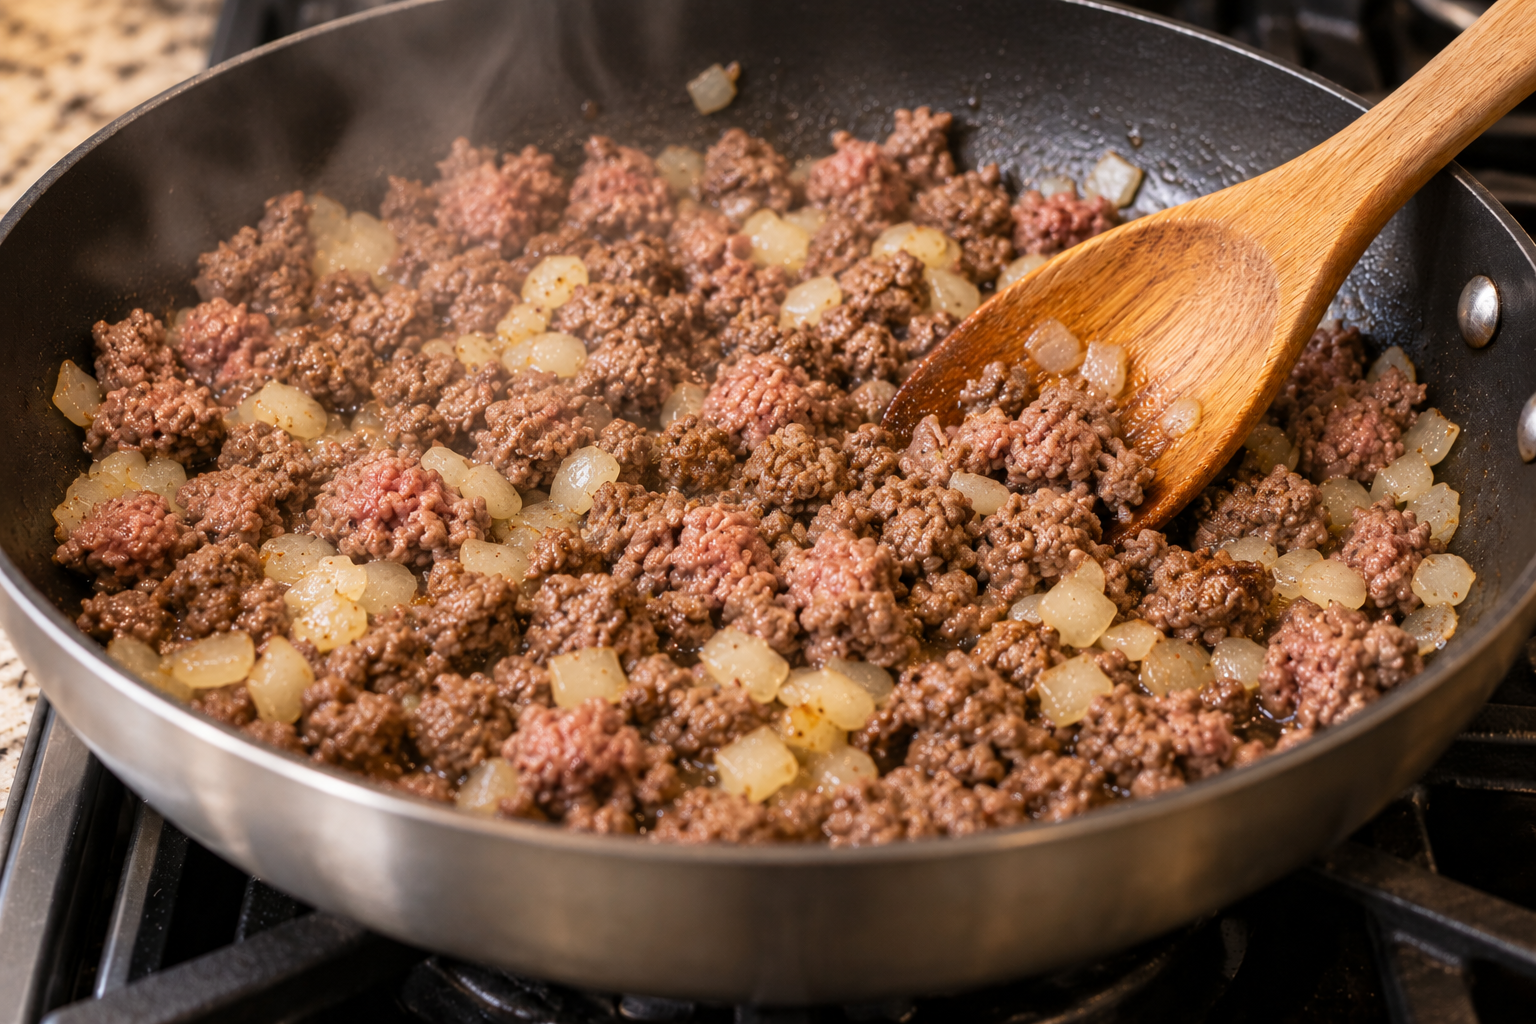
Once the beef is browned, stir in the tomato paste, soy milk, diced red and green peppers, paprika, chili powder, turmeric, garlic powder, black pepper, garam masala and salt.
Continue stirring until everything is evenly distributed.
What you're looking for is beef that's broken into fairly small pieces. Large chunks make the cones harder to fill and much messier to eat.
Step 4 — Let the Filling Thicken
Continue cooking until the mixture has thickened and excess moisture has cooked away, about 5 minutes.
Remove the skillet from the heat and allow the filling to cool slightly.
💡 This step matters: Hot, wet filling creates steam inside the tortilla. Giving the beef a few minutes to cool and thicken helps protect that crispy shell.
🌯 How to Make the Tortilla Cone Shape
This is probably the part you're wondering about, but it's much easier once the tortilla is in your hands.
Step 5 — Cut and Roll the Cones
Cut each large tortilla in half.
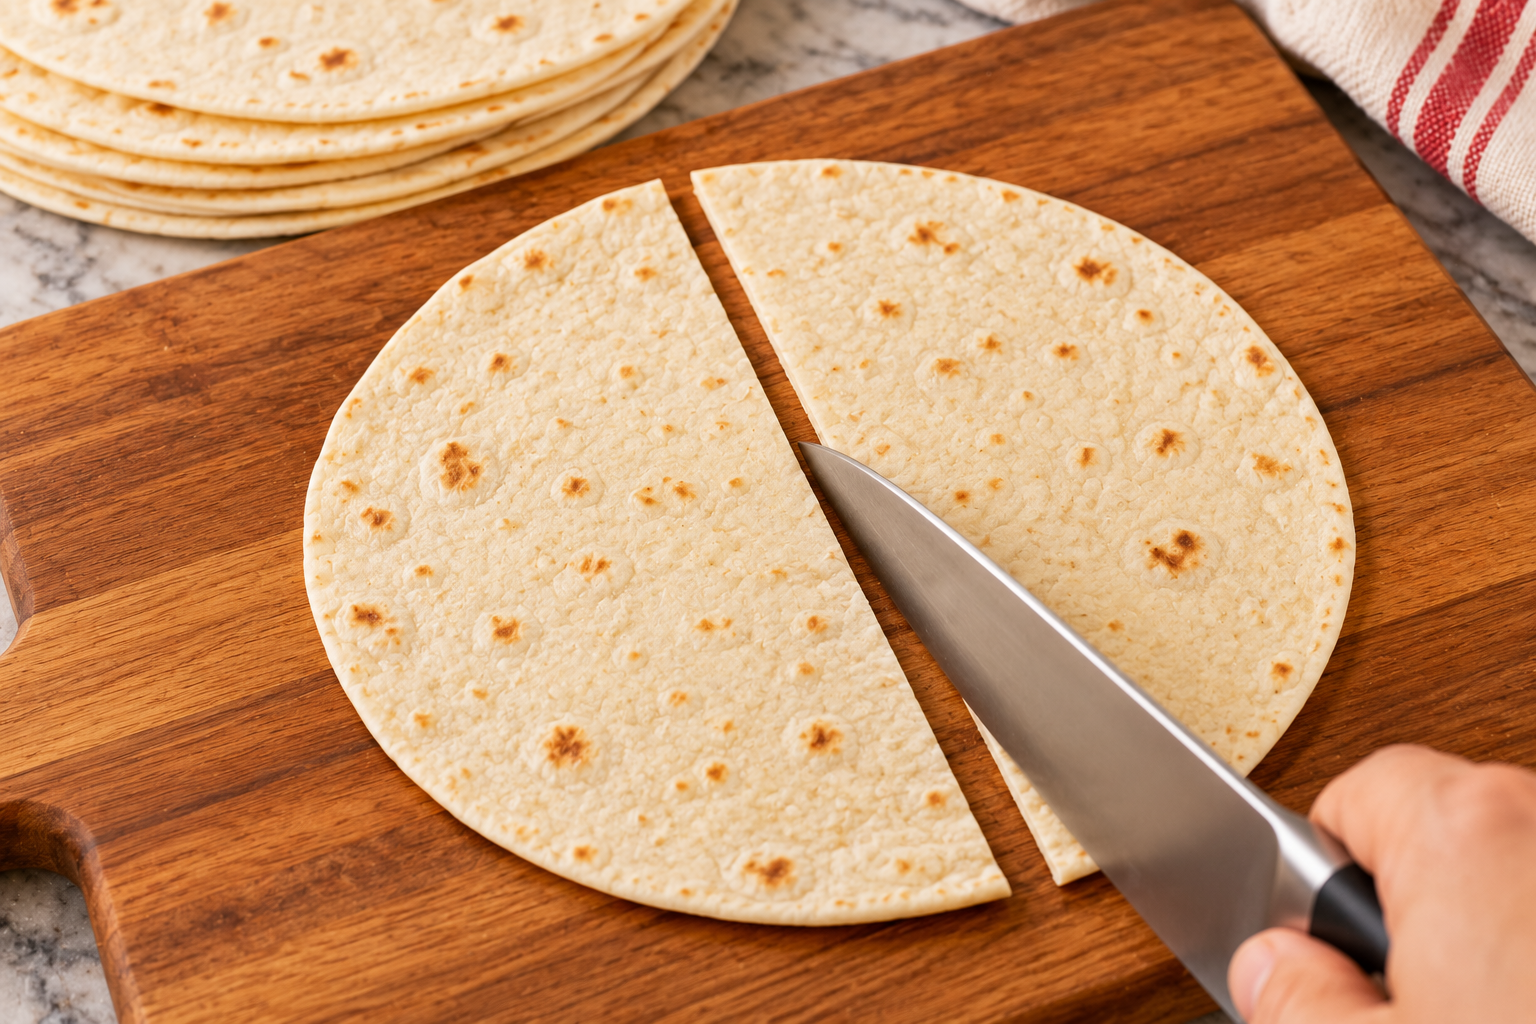
Take one tortilla half and roll it into a cone, overlapping the cut edges enough that there isn't a large opening at the bottom.
Secure the overlapping edge with a toothpick.
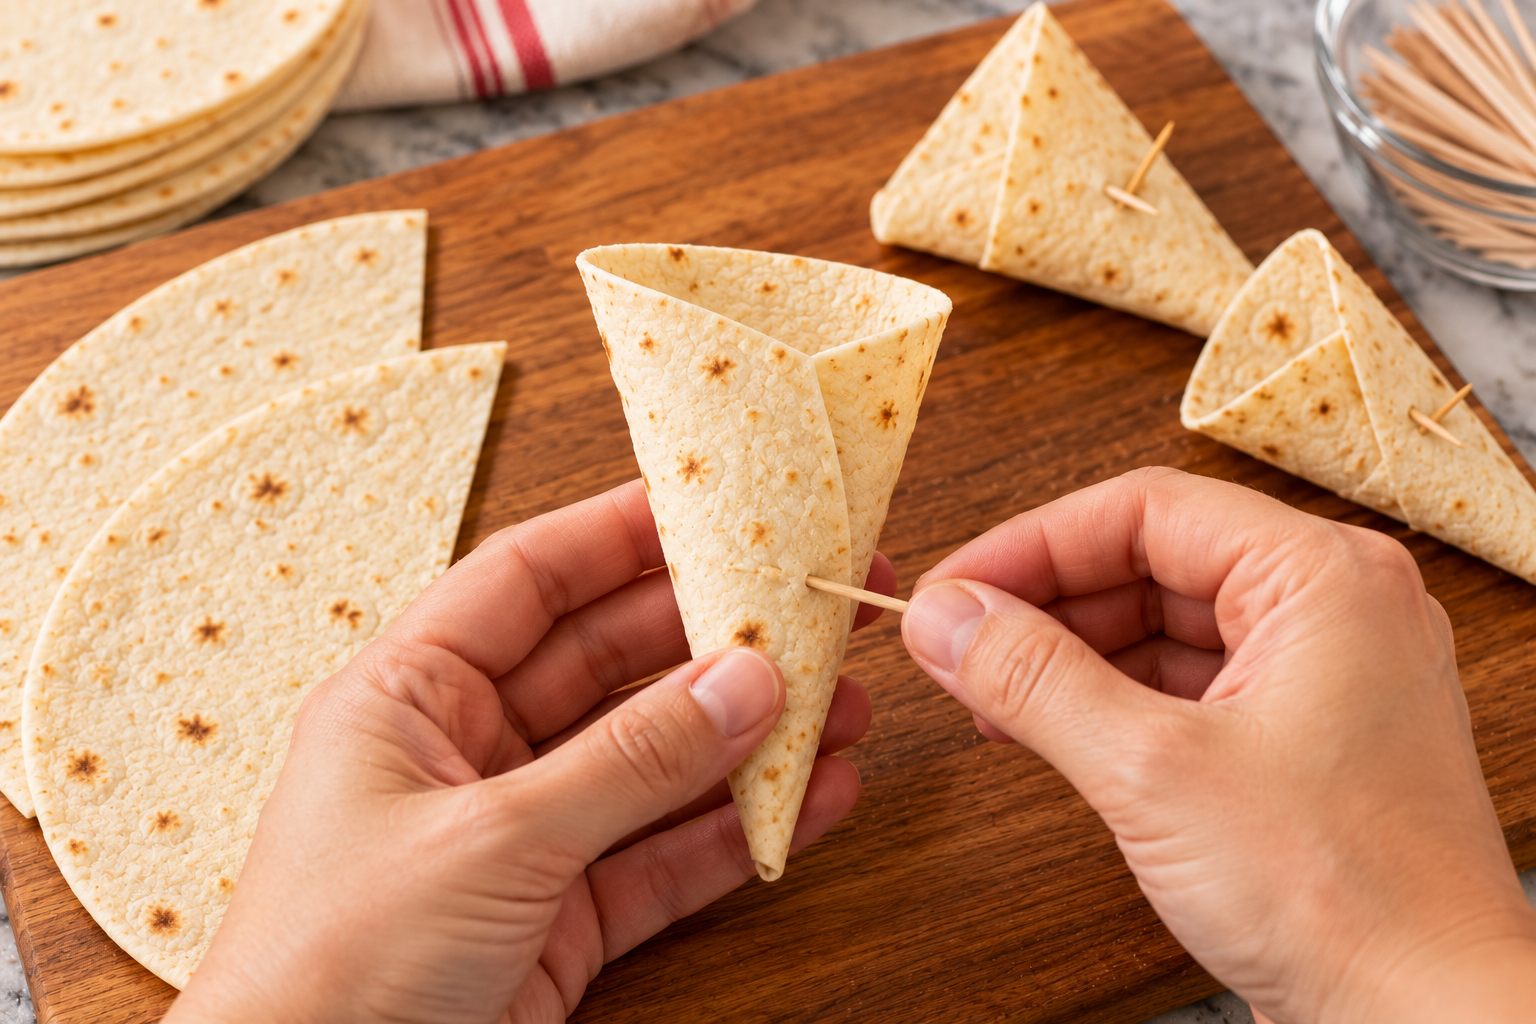
Repeat with the remaining tortilla halves until you have 12 cones.
💡 If your tortilla cracks while rolling: Warm it briefly first. A few seconds of gentle heat makes tortillas much more flexible and easier to shape.
And don't make the bottom opening too large. You're making a container for the beef, so the narrower end needs to stay fairly snug.
🔥 The Secret to Really Crispy Beef Cones
Here's the small technique that makes the biggest difference.
For extra-crispy cones, give the empty tortilla shells a short head start in the oven or air fryer before filling them.
You're not trying to fully brown them at this point. You're simply setting the shape and beginning to dry the tortilla.
Then add the beef and mozzarella and return them to the heat to finish.
This is especially helpful if you're serving the cones on a platter where they may sit for several minutes before everyone eats.
The other rule is just as important:
Don't pack the beef filling tightly into the cone.
A generously filled cone is good. An overstuffed cone tends to split, soften and spill.
That's the difference between a cone you can comfortably pick up and one that requires a fork halfway through.
Step 6 — Fill, Add Cheese and Bake
Fill each tortilla cone with the beef mixture.
Arrange the filled cones on a baking tray and top each with mozzarella.
Bake or air fry for approximately 5–7 minutes, or until the tortilla is crisp and golden and the mozzarella has melted.
Finish with chopped parsley and serve while they're hot and crisp.
🔧 Troubleshooting: Small Fixes That Make a Big Difference
| If you notice… | What probably happened | What helps |
|---|---|---|
| The cones aren't crispy | The tortillas went straight from shaping to a moist filling | Give the empty cones a short pre-bake or air-fry before filling |
| The cones split open | They were packed with too much beef | Fill generously but don't compress the filling |
| The bottoms are soggy | The beef mixture contained too much liquid | Cook the filling until thickened and let it cool slightly |
| The tortilla cracks while shaping | It is too cold or dry | Warm the tortilla briefly before rolling |
| The edges are getting too dark | The cones have been baked too long | Remove them once golden and crisp; the filling is already cooked |
| The cheese isn't nicely melted | The cones were removed too soon | Add the mozzarella on top and give them another minute or two |
🌶️ Variations
Spicy Beef Cones
Add chopped jalapeño, extra chili powder or a little cayenne to the beef mixture.
Chicken Cones
Replace the ground beef with cooked shredded chicken and season it the same way.
Vegetarian Cones
Skip the meat and use a mixture of sautéed mushrooms, beans and peppers. Keep the filling fairly dry so the cones remain crisp.
Change the Cheese
Mozzarella gives you that mild flavor and stretchy finish, but cheddar, Monterey Jack or a combination of cheeses will work too.
Gluten-Free Beef Cones
Use flexible gluten-free tortillas. Warm them before rolling because some gluten-free tortillas crack more easily when cold.
If crispy beef-and-tortilla dinners are your thing, you'll probably also enjoy my Quesabirria Tacos — another recipe built around the combination of savory beef, cheese and a crisp tortilla. wellnesssleuth
🥗 What to Serve with Crispy Beef Cones
These can absolutely be served as an appetizer, but add something fresh alongside them and they easily become dinner.
For a fresh contrast to the beef and cheese, try my Hearty Greek Salad. The cucumber, tomato and tangy dressing help cut through the richness of the cones. wellnesssleuth
A cool garlic sauce, ranch-style dip, salsa, sour cream or Greek yogurt dip also works beautifully.
For a bigger party spread, put the cones in the middle of the table with several dips and let everyone choose their own.
🧊 Make Ahead, Storage & Reheating
Can I make the beef filling ahead?
Yes. In fact, this is the part I would prepare ahead.
Cook the beef filling, let it cool and refrigerate it in an airtight container. When you're ready to serve, shape the tortillas, fill them and bake.
How long do leftovers keep?
Store leftover filled cones in an airtight container in the refrigerator for up to 3 days.
What's the best way to reheat them?
Use the oven or air fryer rather than the microwave.
The microwave will heat the filling, but it also traps moisture and softens the tortilla. Dry heat gives the shell a much better chance of becoming crisp again.
Can I freeze beef cones?
Yes. The source recipe recommends freezing the assembled, unbaked filled cones on a tray first. Once firm, transfer them to a freezer-safe bag or container.
Bake or air fry from frozen until the center is thoroughly hot and the cheese is melted.
❓ Frequently Asked Questions
How do you keep tortilla cones from opening while baking?
Overlap the tortilla edges when forming the cone and secure them with a toothpick. Don't remove the toothpick until the tortilla has crisped enough to hold its shape.
Do I have to pre-bake the tortilla cones?
No. You can fill and bake them according to the basic method.
However, if maximum crunch is your priority, briefly crisping the empty cones first is worth the extra few minutes.
Can I make these in an air fryer?
Yes. The air fryer is particularly useful for getting the tortilla exterior crisp.
Don't overcrowd the basket. Air needs to circulate around the cones, so work in batches if necessary.
Why did my beef cones turn soggy?
Usually there's too much moisture in the filling.
Let the beef mixture cook until noticeably thickened, allow it to cool slightly before filling the tortillas, and don't assemble the cones too far in advance.
Can I prepare the cones several hours before a party?
I wouldn't completely assemble them hours ahead.
Prepare the beef mixture in advance and refrigerate it separately. Shape and fill the cones closer to serving time so the tortillas aren't sitting against moist filling for hours.
Are Crispy Beef Cones an appetizer or a meal?
They can be either.
One or two make a fun appetizer or party snack. Serve several per person with a salad and dipping sauce and they become an easy casual dinner.
❤️ Why These Are Worth Making
The thing I like most about these Crispy Beef Tortilla Cones isn't really the novelty of the shape — although they certainly look good piled onto a platter.
It's that the shape actually makes sense.
You get crisp tortilla in practically every bite, the seasoned beef stays tucked inside instead of falling across the plate, and the melted mozzarella sits right at the opening where it can brown and bubble.
They're familiar enough that even a cautious eater knows exactly what they're getting, but different enough from ordinary tacos to make dinner feel a little more fun.
Put them out hot, add a bowl of cool dipping sauce, and don't be surprised if the first platter disappears while you're still bringing everything else to the table.
PrintCrispy Beef Tortilla Cones with Melted Mozzarella
- Total Time: 40 minutes
- Yield: 12 cones 1x
- Diet: N/A
Description
Crispy tortilla cones filled with juicy seasoned ground beef, colorful peppers and topped with melted mozzarella. A fun handheld appetizer that's perfect for parties, game day or an easy casual dinner.
Ingredients
ngredients Groups
Tortilla Cones
- 6 large tortillas (10–12 inches / 25–30 cm)
- Toothpicks
Beef Filling
- 400 g (0.8 lb) ground beef
- 1 yellow onion, finely chopped
- 4 garlic cloves, minced
- 1 red bell pepper, diced
- 1 green bell pepper, diced
- 1 tablespoon tomato paste
- 100 ml soy milk (about ½ cup)
Cheese & Garnish
- 100 g mozzarella cheese
- 1 teaspoon chopped parsley
Seasonings
- 1 teaspoon paprika
- 1 teaspoon chili powder
- 1 teaspoon turmeric
- 1 teaspoon garlic powder
- 1 teaspoon black pepper
- 1 teaspoon garam masala
- ½ teaspoon salt
Instructions
1. Prepare the Beef Mixture
Heat a little oil in a large skillet over medium heat. Add the finely chopped onion and sauté for 3–4 minutes, until softened.
2. Add the Garlic
Stir in the minced garlic and cook for about 30 seconds, until fragrant.
3. Cook the Beef
Add the ground beef and cook for 8–10 minutes, breaking it apart with a wooden spoon. Stir in the tomato paste, soy milk, diced red and green bell peppers, paprika, chili powder, turmeric, garlic powder, black pepper, garam masala and salt.
4. Thicken the Filling
Continue cooking for about 5 minutes, until the beef mixture has thickened and excess moisture has cooked away. Remove from the heat and allow it to cool slightly.
5. Prepare the Tortilla Cones
Cut each tortilla in half. Roll each half into a cone shape, overlapping the edges, and secure with a toothpick. Repeat to make 12 cones.
6. Fill the Cones
Spoon the beef mixture into each tortilla cone without overfilling. Arrange the filled cones on a baking tray and top with mozzarella.
7. Bake Until Crispy
Bake or air fry for approximately 5–7 minutes, until the tortillas are golden and crisp and the mozzarella is melted.
8. Garnish & Serve
Sprinkle with chopped parsley and serve the Crispy Beef Tortilla Cones warm with your favorite dipping sauce.
Notes
For the crispiest tortilla cones, briefly pre-bake or air fry the empty cones before filling. Cook the beef mixture until thickened and allow it to cool slightly before filling so excess moisture doesn't soften the tortillas. Avoid overfilling the cones, and reheat leftovers in the oven or air fryer rather than the microwave.
- Prep Time: 20 minutes
- Cook Time: 20 minutes
- Category: Appetizer
- Method: Baking
- Cuisine: American


Leave a Reply