Creating Homemade Greek-Style Yogurt using the Instant Pot® is a convenient and delicious way to enjoy a taste of the Mediterranean.

By simply adding your ingredients to the Instant Pot® and allowing it to work its magic, you can have a creamy and tangy yogurt that transports your taste buds to Greece. This homemade yogurt is not only a snack but also a time-saving culinary adventure that will make you feel like a kitchen hero with a touch of Mediterranean flair.
A homemade yogurt so heavenly, you'll question why you haven't embarked on this culinary adventure earlier.
Now, here's where the real magic happens – the transformation from regular yogurt to a delightful Greek-style variation. Get a piece of cloth, strain that creamy mixture, and witness the evolution into a thick and smooth texture that rivals the most exquisite delicacies. The Instant Pot® effortlessly elevates you from a beginner in the kitchen to a master of yogurt-making. Spread it on your morning cereal, drizzle it with sweet honey, or pair it with fresh fruits for a symphony of flavors. The outcome? A homemade yogurt so heavenly, you'll question why you haven't embarked on this culinary adventure earlier. So, say goodbye to mediocre store-bought options and let your Instant Pot® shine as the hero in your pursuit of creamy and dreamy Greek-style delight. Indulge in the deliciousness that rivals the gods themselves, all created right in your own kitchen – a confirmed culinary triumph!

This was inspired by my other recipe on this site, and pairs well with this amazing sidedish recipe.
Prep time: 5 minutes
Active cook time: 45-55 minutes
Incubation time: 8-10 hours
Serves: 4-6
Jump to:
- A homemade yogurt so heavenly, you'll question why you haven't embarked on this culinary adventure earlier.
- Ingredients needed to make Homemade Greek-Style Yogurt
- How to make Homemade Greek-Style Yogurt
- Variations on the Homemade Greek-Style Yogurt recipe
- Equipment used in making Homemade Greek-Style Yogurt
- Storage for the Homemade Greek-Style Yogurt
- Top tips to know when making Homemade Greek-Style Yogurt
- Related
- Pairing
- Greek Isles Instant Pot® Yogurt Adventure
Ingredients needed to make Homemade Greek-Style Yogurt
½ gallon whole milk
2 packets of yogurt starter
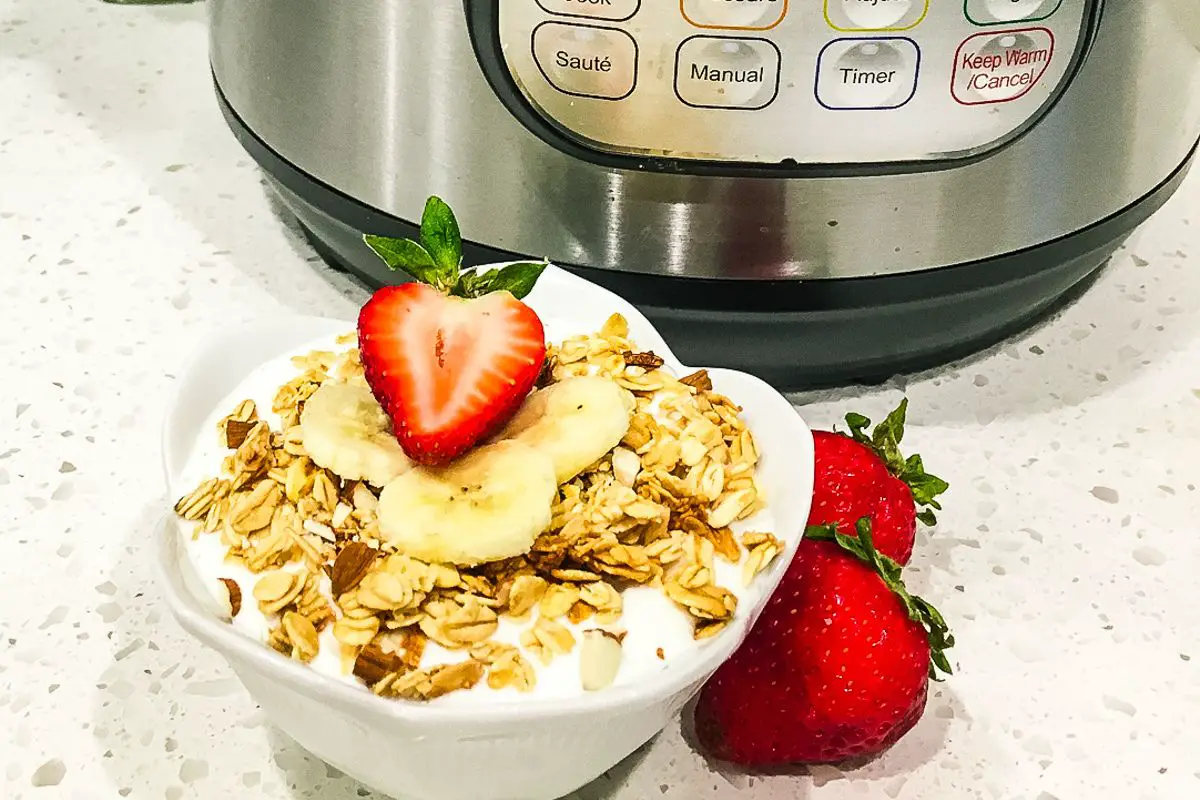
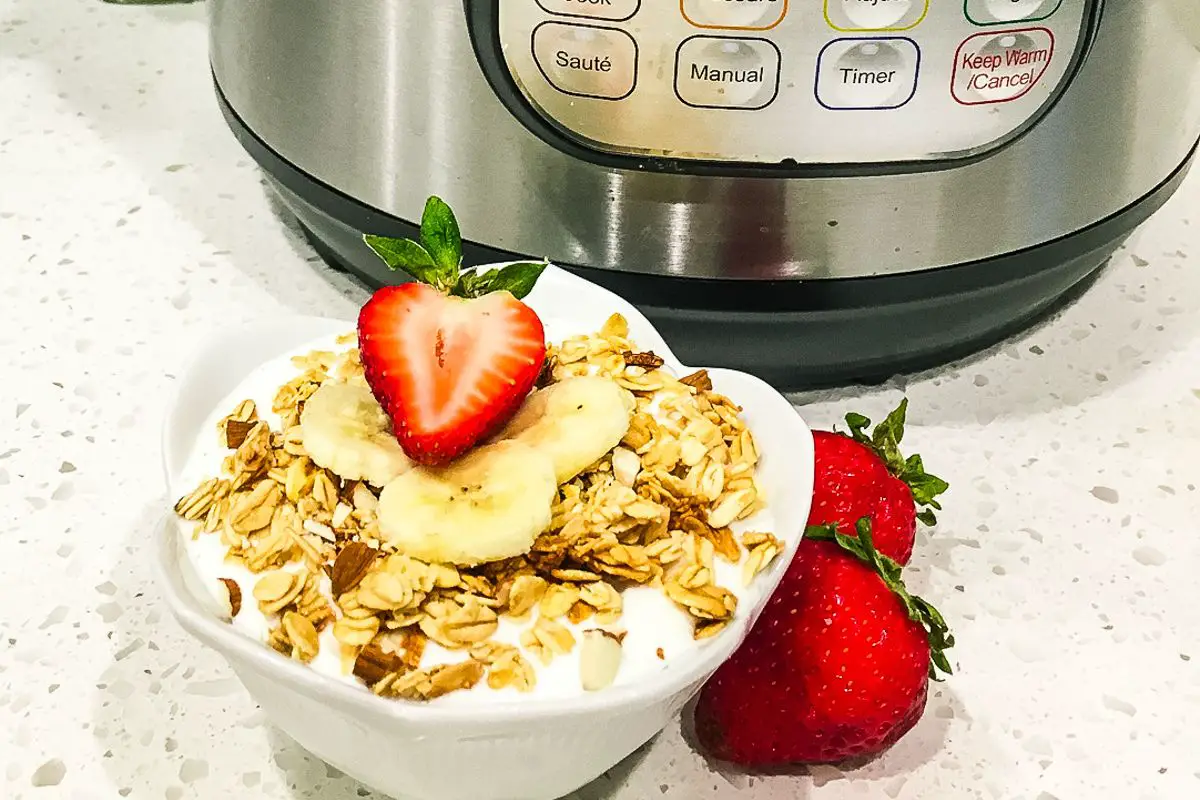
Optional, To Serve: (as pictured)
Fresh strawberries and bananas, sliced
Granola

How to make Homemade Greek-Style Yogurt
- Add milk to Instant Pot® and select the ‘Yogurt’ function. Select ‘Adjust’ until the screen says ‘boiL.”
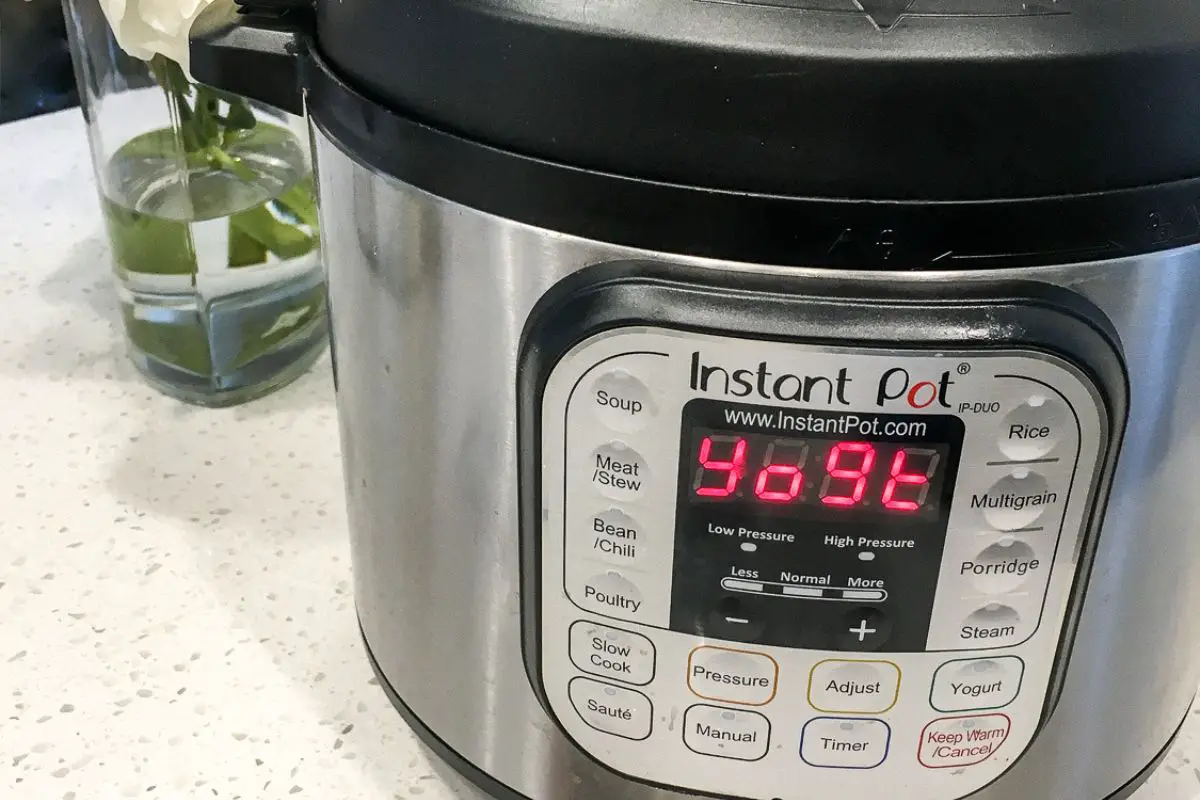
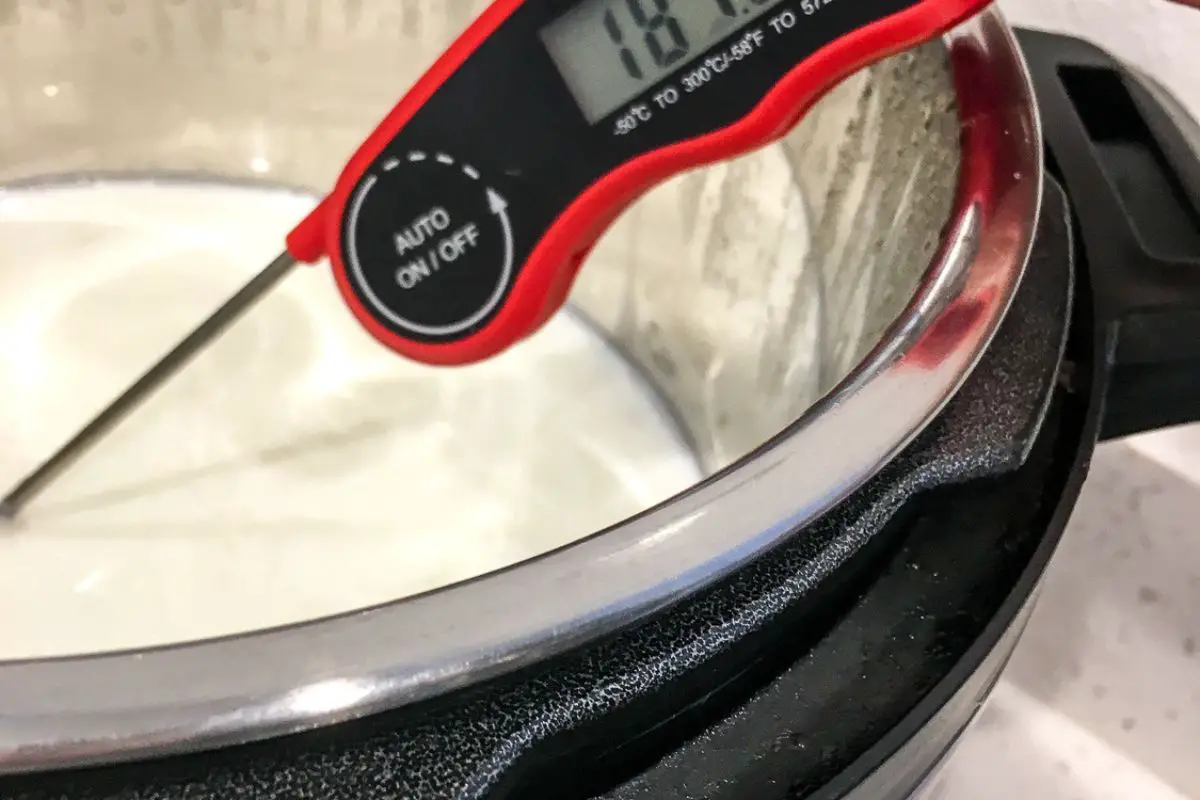
- Add the lid and wait until the unit beeps to indicate it is finished boiling. The screen will say “YoGt” when done. (See image) Insert instant-read thermometer into the milk to ensure it has reached at least 180°F
- Turn the unit off and remove the pot to allow the milk to cool. For quicker results, place the pot in a tub of cold water or leave it on the counter to cool naturally.
- When an instant read thermometer reads 110°F, the milk is cool enough to add the yogurt starter. For best results, remove about a cup of the milk from the pot and stir the starter into that before pouring into the rest of milk in the pot.
- Return pot to unit and cover with the lid (no need to seal for this function). Select the ‘Yogurt’ function again and make sure the setting is on “Normal’ (NOT “Low” – very important!) and adjust time for 8-10 hours. The longer the incubation period, the tangier the yogurt will be.
- When the yogurt is done incubating, remove the lid and turn unit off. Line a strainer with some cheesecloth and place over a large bowl. Pour yogurt into the strainer and place in the refrigerator to strain for several hours to overnight. The longer the yogurt is allowed to strain, the thicker the yogurt will be.
- Once yogurt is strained, discard the liquid whey (or save to use in smoothies) and transfer the yogurt to a bowl. If the yogurt texture is lumpy, process with an immersion blender or hand mixer until creamy and smooth.
- Serve immediately topped with fresh fruit, granola, and a drizzle of honey, if desired, or store in an airtight container in the refrigerator for several days. Enjoy!


Variations on the Homemade Greek-Style Yogurt recipe
- Honey-Lemon Twist: Drizzle a generous amount of honey and a splash of fresh lemon juice into your Instant Pot® Greek-Style Yogurt for a zesty kick that balances the creamy goodness.
- Mango Tango Madness: Amp up the tropical vibes by folding in diced ripe mango chunks. It's like a vacation for your taste buds, right in your yogurt bowl.
- Crunchy Almond Delight: Add some texture with a handful of toasted almonds. The nutty crunch pairs perfectly with the silky smoothness of the Greek-style yogurt.
- Berry Bonanza Blast: Mix in a medley of fresh berries – strawberries, blueberries, and raspberries – for a burst of color and a fruity explosion in every spoonful.
- Cinnamon Swirl Sensation: Sprinkle a dash of cinnamon into your yogurt, then give it a gentle swirl. It's like the cozy warmth of a cinnamon roll, minus the guilt.
- Pomegranate Perfection: Toss in juicy pomegranate arils for a pop of sweetness and a delightful burst of flavor. It's like a festive celebration in your yogurt bowl.
- Coconut Cream Dream: Transport yourself to a tropical paradise by mixing in shredded coconut. Close your eyes, take a bite, and imagine the sound of waves crashing.
- Chocolate Hazelnut Heaven: For a decadent twist, stir in a dollop of chocolate hazelnut spread. It's like Nutella, but with a Greek-style yogurt upgrade.
- Maple-Pecan Magic: Drizzle maple syrup over your yogurt and sprinkle chopped pecans for a taste reminiscent of a comforting fall day.
- Savory Herb Infusion: Surprise your taste buds by going savory. Mix in finely chopped fresh herbs like dill, mint, or chives for a Greek-inspired herbed yogurt that pairs well with savory dishes.
Equipment used in making Homemade Greek-Style Yogurt
Instant Pot Duo60 6 Qt. 7-in-1 Multi-Use Programmable Pressure Cooker, Slow Cooker, Rice Cooker, Steamer, Sauté, Yogurt Maker and Warmer
Yogurt Starter Cultures:
Instant Read Thermometer:
Storage for the Homemade Greek-Style Yogurt
The shelf life of homemade Greek-style yogurt stored in the fridge depends on several factors, including the ingredients used, the cleanliness of utensils, and the storage conditions. Typically, homemade yogurt can be stored in the refrigerator for about 1 to 2 weeks. It's important to keep it in a sealed container to prevent the absorption of odors from the fridge and to maintain its freshness.
If you notice any off smells, changes in color, or unusual textures, it's a sign that the yogurt may have spoiled, and it's best to discard it. Additionally, always use clean utensils when scooping out yogurt to prevent introducing contaminants that could spoil the batch more quickly.
For a more accurate assessment of the shelf life, consider checking the expiration date of the milk used to make the yogurt, as this can impact how long the yogurt will stay fresh.

Top tips to know when making Homemade Greek-Style Yogurt
- Patience is a Virtue: Making Instant Pot® Greek-Style Yogurt is a bit like growing a plant – it takes time. Let the Instant Pot® work its magic during the fermentation process. Your patience will be rewarded with creamy goodness.
- Milk Matters: Choose whole milk for a richer yogurt or opt for 2% for a slightly lighter version. Skim milk? Not the best choice here. Fat equals flavor in the yogurt world.
- Starter Culture Secrets: Your yogurt's flavor is heavily influenced by the starter culture. Opt for a high-quality Greek yogurt with live active cultures as your starter for the best results.
- Temperature Tidbits: Heat your milk to around 180°F (82°C) before letting it cool to about 110°F (43°C) before adding the starter. This temperature dance helps create the perfect environment for the cultures to thrive.
- Insulate and Incubate: Wrap your Instant Pot® with towels during the incubation phase to help maintain a stable temperature. Think of it as giving your yogurt a cozy blanket for optimal fermentation.
- Straining Secrets: When straining for that Greek-style thickness, let it strain in the fridge for at least 4 hours, or overnight for an extra creamy texture. Cheesecloth or a fine-mesh strainer works wonders.
- Save That Whey: Don't toss the whey that drains off during straining! It's packed with nutrients and can be used in smoothies, baking, or even as a protein boost in soups.
- Sweeten Smartly: If you're into sweet yogurt, add sweeteners after the yogurt is done. Honey, maple syrup, or sugar – go easy at first and adjust to your taste.
- Go for Flavor Additions: Experiment with flavors by adding extracts, spices, or fruit purees to the milk before incubation. A little creativity can lead to a whole new world of yogurt experiences.
- Refrigeration Revelation: Let your finished Greek-style yogurt chill in the fridge for a few hours before diving in. This extra step enhances the flavors and gives you that perfect, chilled yogurt experience.
Related
Looking for other recipes like this? Try these:
Pairing
These are my favorite dishes to serve with [this recipe]:

Greek Isles Instant Pot® Yogurt Adventure
- Total Time: 0 hours
- Yield: 4 - 6 servings
Description
Creating homemade Greek-style yogurt using the Instant Pot® is a convenient and delicious way to enjoy a taste of the Mediterranean
Ingredients
½ gallon whole milk
2 packets of yogurt starter
Optional, To Serve: (as pictured)
Fresh strawberries and bananas, sliced
Granola
Instructions
-
Add milk to Instant Pot® and select the ‘Yogurt’ function. Select ‘Adjust’ until the screen says ‘boiL.” (See image)
-
Add lid and wait until the unit beeps to indicate it is finished boiling. The screen will say “YoGt” when done. (See image) Insert instant read thermometer into the milk to ensure it has reached at least 180°F (see images).
-
Turn unit off and remove pot to allow milk to cool. For quicker results, place pot in a tub of cold water or leave on the counter to cool naturally.
-
When an instant read thermometer reads 110°F, the milk is cool enough to add the yogurt starter. For best results, remove about a cup of the milk from the pot and stir the starter into that before pouring into the rest of milk in the pot.
-
Return pot to unit and cover with the lid (no need to seal for this function). Select the ‘Yogurt’ function again and make sure the setting is on “Normal’ (NOT “Low” – very important!) and adjust time for 8-10 hours. The longer the incubation period, the tangier the yogurt will be.
-
When the yogurt is done incubating, remove the lid and turn unit off. Line a strainer with some cheesecloth and place over a large bowl. Pour yogurt into the strainer and place in the refrigerator to strain for several hours to overnight. The longer the yogurt is allowed to strain, the thicker the yogurt will be.
-
Once yogurt is strained, discard the liquid whey (or save to use in smoothies) and transfer the yogurt to a bowl. If the yogurt texture is lumpy, process with an immersion blender or hand mixer until creamy and smooth.
-
Serve immediately topped with fresh fruit, granola, and a drizzle of honey, if desired, or store in an airtight container in the refrigerator for several days. Enjoy!
Notes
At first glance, this recipe may seem a bit complicated, but it’s actually very easy once you get the steps down. Once you’ve made a couple batches of this delicious, creamy, and smooth Greek Style yogurt, you’ll never want to buy the store-bought varieties again.
Note: You can use any plain, non-flavored yogurt with active cultures in place of the packaged yogurt starter used here. You can also save some of each batch you make to use as starter for future batches. Simply freeze in ice cube trays, and then thaw completely when ready to make another batch.
- Prep Time: 5 minutes
- Cook Time: 45 - 55 minutes


Leave a Reply
You must be logged in to post a comment.